Shooting In Manual Mode- A Beginner’s Guide

Everything You Need To Know About Shooting in Manual

A Quick Guide

Photo Equipment Low Rez_0915  The photo above shows what equipment I use out in the field but you don’t need all this gear. You do need to know the basics to shoot in manual mode. Shooting in manual puts you in a different classification of photographer. You are no longer a novice and can now show off to your friends that YOU shoot in manual and are more creative. These tips are primarily for those using a DSLR camera. Shooting in manual mode requires properly setting your ISO, F-stop and Shutter Speed.


1. ISO   Set your ISO according to the lighting conditions. ISO refers to the sensitivity of your camera’s sensor. Kind of like in the old film days where you would buy film according to its sensitivity. A typical ISO for daytime lighting would be from 100 to 400. Nighttime photography may require an ISO of 800 and up to 3200. However, the lower the ISO number, the less grain you will see on your photos. There should be a button for ISO on the outside of your camera body. Setting the ISO will determine your F-stop and Shutter Speed.

Canon_60D_camera_tips.60d_iso


2. F-stop or Aperture   This setting refers to the size of the opening through which light goes through your lens to your camera’s sensor. A lower F-stop (F 4.0) lets a lot of light through to the sensor. A high F-stop (F 22.0) lets a small amount of light through. However, a lower F-stop will give you less depth of field meaning not all of the objects in your image will be in focus. Sometimes this may be the effect you are looking for. An F-stop over 14 will produce sharper photos from the foreground to the background. I like to set my F-stop between 9 and 16 depending on the subject. Camera lenses have different minimum F-stops. A faster or more expensive lens may have an F-stop as low as 2.8 while some only go down to 4.0.


nikon-50mm-f1-4-lens-glass-photography-video-camera-equipment-gear-f-stop-focus-ring-photo


3. Shutter Speed  Refers to the amount of time your shutter is open to allow light in to the sensor. The shutter slides back and forth across the aperture. It’s amazing that the camera manufacturers can set this at such small intervals. The longer the shutter is open, the more light hits your sensor. In bright sunshine, the shutter should be set to open and close very quickly. The numbers you see below refer to the fraction of a second that the shutter is open. 500 means 1/500th of a second which is really fast. Your subject is so bright that your sensor can only handle a brief moment of light(1/500th of a second). I don’t think I have ever set my shutter speed faster than 1/500th.  Shooting landscape with a tripod allows you to shot at slower speeds.  However, too slow of a speed(multiple seconds) may produce noise or grain in the image file along with?, high ISO.

????????????????????????????????????????????????????

Faster shutter speeds also allow you to freeze moving subjects like birds flying through the sky. The shutter speed was 1/500th of a second on the shot below.

GUADALUPE BROWN PELICANS

Conversely, a cloudy day or low light conditions will necessitate a slower shutter speed.  Slow shutter speeds like 1/10th of a second to 5 seconds will produce movement or smoothness with a subject and require a tripod. You can successfully handhold for a shot without blurring depending on focal length. For instance, if your lens is 55mm, you can handhold a shot with a shutter speed as slow as 1/50th of a second and not get image blur.

Smoothing the water in a waterfall produces results like the image below. ISO- 100, Fstop-F18, Shutter Speed- 1.6 seconds.  The slow shutter speed is what smooths the water. I used a Neutral Density filter to darken the subject in order to lengthen the exposure.  If it’s pretty dark out already, you may not need the filter. A polarizing filter will also work.

Emerald Pools Falls


4. Balance. Setting the ISO, Aperture and Shutter Speed requires a balancing act.

CopyofDrawing-e1375910862443

Setting one will affect the other settings. For instance, if you decrease your shutter speed, you will be letting more light to your sensor and thereby overexposing the shot. To correct for that, you can either adjust the ISO lower or the F-stop to a higher number which prevents less light to the sensor. If you reduce the shutter speed from 1/500 to 1/250, you will need to increase your F-stop by 1 stop from lets say F11 to F13. When looking into your viewfinder and partially pressing the exposure button, you will notice a grid at the bottom of your viewfinder with vertical lines and one bigger, solid one in the middle.(See image below)  When you make adjustments with shutter speed and/or F-stop, your cursor at the bottom will move either left or right. What you want to do is to place your cursor right in the middle of the grid, at the zero mark. You may find like I do, that you prefer the cursor slightly left of center which produces a slightly less-exposed shot than what the in-camera sensor is telling you. When you decrease the shutter speed, the cursor will move to the right of zero but if you increase the F-stop number, the cursor will move back to the left. When the cursor is in the middle, it is time to release the shutter!  Don’t forget to focus! Your camera may be slightly different but most work essentially the same.

PerfectExposure-6

On my Canon, this grid is also viewed on the top of the camera and the back LCD so you don’t have to look into the viewfinder but you do have to press shutter button half way.

DCM120.supp_setup.apertureshutterspeed


canon 5d back LCD ZURBACK-S


Sample Shots with corresponding manual settings

For a night scene like below where light is low, I used an ISO of 1250, F-stop- of 4.5, Shutter Speed of 1/15 sec. Because of the slower shutter speed, the moving vehicles will be blurred which can be effective in showing movement. Using a tripod like I did here, will prevent blur in the lights of the skyscrapers.

Los Angeles at Night

Conversely, during bright sunshine, I used an ISO of 200, F9.0 at 1/250. The faster shutter speed froze the movement of the vehicles.

La Paz_9745


The two images below were shot from the same place but at different times of the day. The image at the top was shot with at ISO of 200, F9 and 1/200. This is pretty typical of daylight exposures.

LOS ANGELES FROM HOLLYWOOD

The nighttime shot was set with an ISO of 400, F22 and exposure of 20 seconds. The F22 setting is letting less light in to the sensor but this allowed me to increase the exposure to 20 seconds. The longer exposure produces the solid lines of vehicle lights. If you weren’t going for this effect, then you would have set the aperture to F4.0. with a shorter exposure time.  This is The Balancing Act!  When I set up for this shot, I wasn’t exactly sure these were the correct settings but through trial and error and checking my LCD, I came up with the correct settings. You definitely need a tripod for this long exposure.

LOS ANGELES EVENING

Practice makes perfect. Keep experimenting with different settings and observe the different image results in your LCD. If you have any questions, you can contact me via email or through my my website  I do conduct personal one on one workshops where you will learn shooting in manual and other creative modes. I reside in Southern Utah and will take you to some of the finest venues to produce those memorable images!  Be on the lookout for an upcoming blog on “Why you should be shooting in Camera Raw”.

SUNRISE OVER BAJA


Get Creative By Blending or Stacking Images

When I was on the California Coast recently, I decided to take numerous exposures of the exact same scene and then blend them in a software program. I also used these jpegs to produce a  time lapse video which can be viewed here

Pacific Ocean Time Lapse Video

But I wanted to see what you could produce if you blend 100 images of a moving scene, like moving waves and clouds. It’s similar to a longer exposure but I took an exposure every 20 seconds for about 35 minutes. Below you’ll also see the result and what the scene looked like with a single  normal exposure. I actually shot 2 different scenes and present them but I also show one image where I blend both scenes, which is the bottom image.

The sun sets over the Pacific Ocean at Cambria, California
First scene with 100 images blended


First scene with only one normal exposure. Not quite so dramatic.


The sun sets over the Pacific Ocean at Cambria, California
The second scene with about 50 images blended. Not quite as dramatic as the first because I used less exposures and the clouds were moving towards the camera.  In image one, the clouds were moving from left to right in the frame.


Cal Coast Sunset Original_0495
The second scene shot with one normal exposure


The sun sets over the Pacific Ocean at Cambria, California
Both scenes blended with about 150 exposures.


So, if you want to get creative, try taking multiple exposures and blending them in Lightroom, Photoshop or stack them with a stacking program like  StarStax

Remember to use a tripod, a shutter release or better, an intervalometer, which programs the length between exposures for your camera. You can just sit there and watch the waves crashing upon the beach.


The Photographer’s Cookbook- And You Can Participate!

Photographer's cookbook


I’m in search of recipes for producing dramatic photos.  This cookbook provides the key ingredients needed to maximize your chances at capturing that 5-star image. This cookbook is a work in progress. Recipes will be added on a regular basis. And you Word Press bloggers can participate!!!  All I need is a cup of creativity and a tablespoon of humor on your part to be included. Supply me with your key ingredients, directions, a sample photo for your recipe. You will then do a guest post on my blog and vice versa.

For example:

Producing  Star Trail Photographs:

Zion Starry Night


Ingredients

1 Digital Camera

1 Cloudless and Moonless Night Away from City Light

1 Shutter Release

1 Tripod

1 Ball Head

1 Headlamp

and 2 tablespoons of patience

Directions

Set up camera on tripod, Use headlamp to properly position the camera for the shot and to read camera settings. Set ISO to its highest for a test shot. The test shot will tell you if you’re pointing the camera in the right direction. Then set your f-stop to its lowest number(i.e.. 4.0),  and bake at ISO 400 for 40 minutes or until done!  You should also enable the long exposure noise reduction feature in your camera and have the camera mode set to BULB


You can also write how you processed the image in Photoshop etc. I’ve looked back at a bunch of my photos and have seen possibilities.  It may not involve the camera settings so much but what you had to do to get the shot.  Like freezing your butt off waiting for that full moon to rise. But put it into the form of a recipe and try to keep it short and fun.   Who wants to go first?


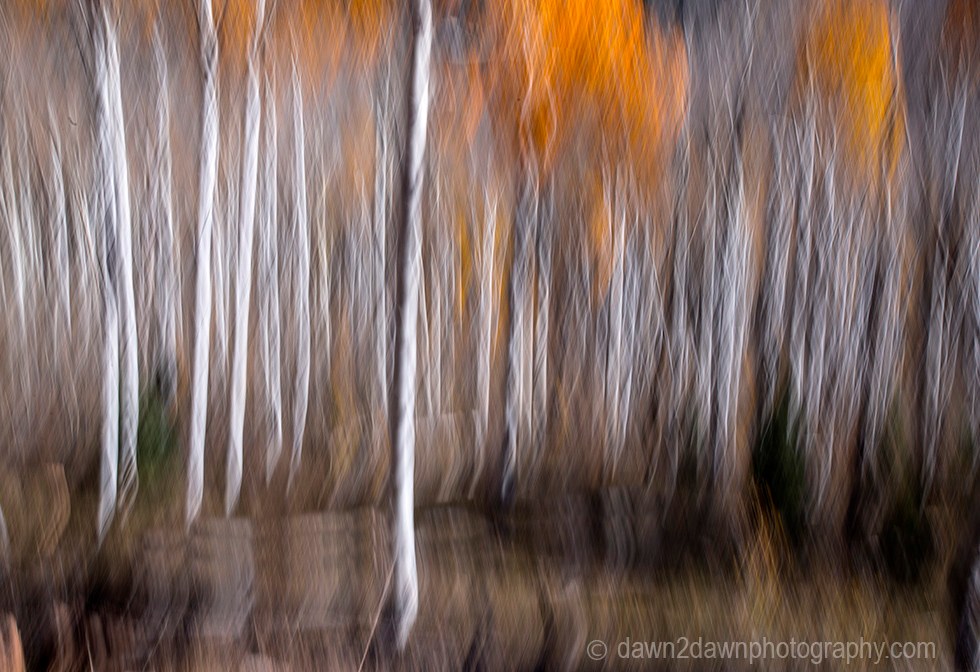
Photography In A Blurrrrrrrrrrrrrrrr (Version 1.0)

Photography In A Blurrrrrrrrrrrrrrrr (Version 1.0).

Painting With Your Camera

You don’t have to be Monet to achieve an impressionistic look to your photos. Just some imagination  and skill with your camera. The following pics shot yesterday are of aspen trees during fall foliage. To achieve this effect, prop your camera on your tripod and set a relatively low shutter speed but that depends on the lighting conditions. It was pretty light when I took these so my F stop was at 18, my ISO at 100, and speed at 1/25 of a second. Later on when it got darker, my shutter speed was 1/4 of a second.  The longer the exposure, the more creative you can get with this. I also had a polarizing filter on my lens. When the shutter releases, have your camera moving slightly up or down or parallel with the dominant lines of your subject. You have to experiment and use your LCD to get some feedback in order to make necessary adjustments.  You want to shoot in manual when doing trying this. The “normal” photos from this shoot will follow in a day or two.

Utah Autumn

Utah Autumn


Utah Fall

Utah Autumn

Utah Autumn

Utah Autumn

Utah Fall_2797